


When I found neural style transfer in September 2015, I was not looking for something to instantly convert my photos into works of art, but rather new tools to use within an artistic workflow. This, I think, puts me in a minority amongst neural style transfer users and developers. Before neural-style, I had been using Processing.org to develop creative image transformations, creating both still and dynamically changing images. Then I needed something more and found it in neural-style, and later on in other style transfer implementations. My artistic goals demanded that I create my own style model images and experiment widely in how the various options will affect the outcome. My software background helped me to experiment further by modifying the software. I even tried to train my own models. And of course, created my own datasets out of my own material.
The concept of an artistic workflow may not be self-evident for many people active in neural style transfer. In this post I try to describe a practical example using fast-neural–style by jcjohnson, an extremely versatile new tool which I intend to review in another post in the near future.
As an artist, I try to create images which bear my own recognizable style and whose content tells something I want it to tell. Not necessarily a story, perhaps more like a mood or a feeling, or a reminiscense of something almost forgotten. Now I started making a new style image from this photo.
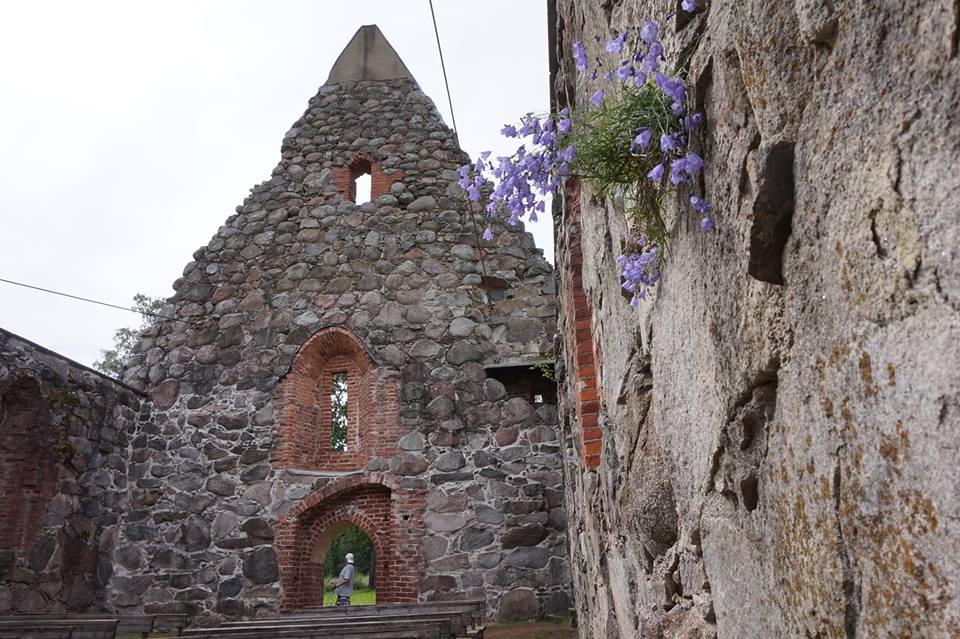
I loaded this photo into my iPad and into ArtRage, a painting app. Using the photo as if it were a fresh painting, I used the palette knife tool to deform and blur the image, starting from the wall on the right. Suddenly I realized that seen from another angle, the wall now looked like ground. I rotated the image and worked the image further, also adding some bluish grey to the sky. You can also see that now the image has a canvas-like texture added by ArtRage. Here I had my next style model.
I now started training models in fast-neural-style. This program has really a lot of user controllable options, even the actual neural network architecture can be easily defined from a large selection of layer types using a short-hand notation. Based on my earlier experience, I selected an architecture which I had found to work (even if the neural networks researchers might not agree with my choice …our goals are different). I also used my own dataset of 2500+ photos of landscapes and other places. I have found that this small dataset of mine produces a different quality, somewhat more rough, compared to the larger COCO dataset which is the default.
I trained several models, varying the style weight. I also tried both my own dataset and the larger COCO dataset. And, even if the researchers say that best quality only comes after around 40000 iterations, I tested the model several times while it was being trained, something like after 2000 iterations, 10000 iterations and so on. For my purposes, the early snapshots of the model often have a more artistic quality, a roughness which is lost when the training continues.
For testing of the model, I used a selected set of photos, again landscapes and places. I found that the new style worked well with certain photos but not all.
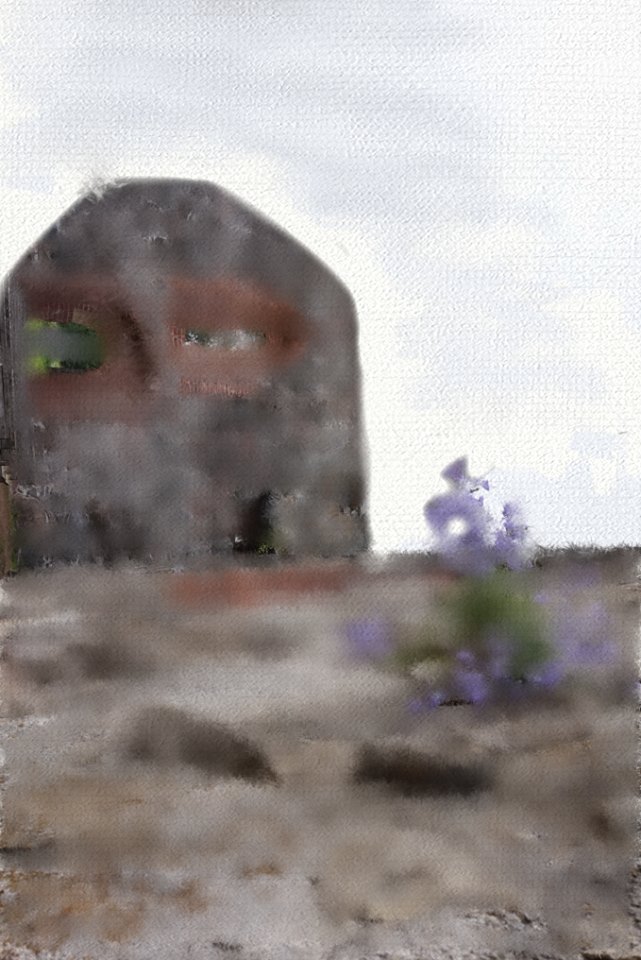
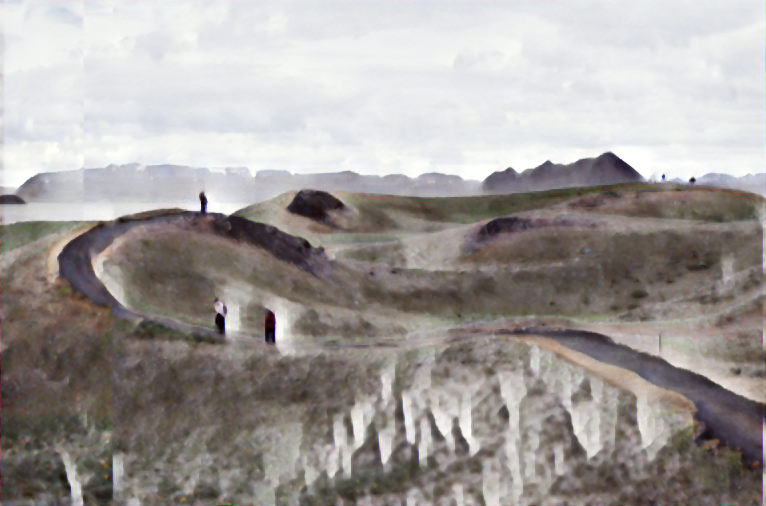
This looks far better than the original photo. All superfluous disturbing details are gone, and the background gradually disappears in a mist. But the style did not work so well with all images. Especially, when the content image did not have a horizon dividing the image and a sky above, the style ended up placing the white mist somewhere else where it usually did not fit in at all. So, this style probably would not work in a commodity like Prisma, where the users would be annoyed every time a style fails to work. For my workflow, the fact that a style is a specialized tool is not a problem but a strength. I can build myself a set of specialized tools which I then can use to work my materials into an image I want to create.
But wait a moment… the misty view… it doesn’t really resemble the style of the model image, does it? It probably doesn’t. When working on styles like this, the styles created can look great but the original style is now longer recognizable. One reason for this is that the scale of style features is smaller than in the original. I have tried to fight this effect, and not been able to completely overcome it, but never mind. You can create great styles even if they are not exact copies of the original. Especially if you are working with art and not just copying something.
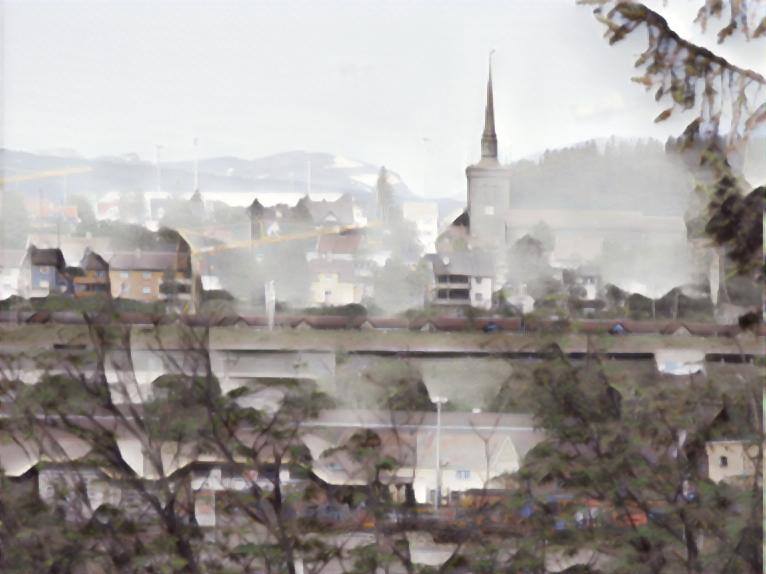
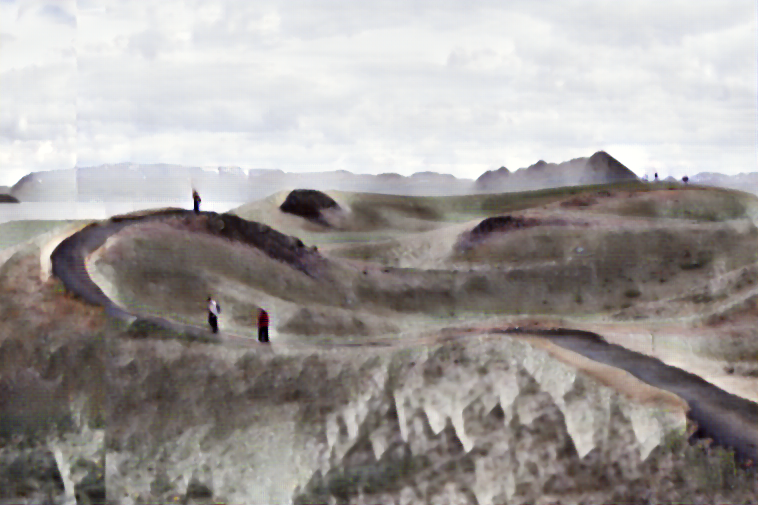
OK, now I had this new style and it worked on landscapes with a clearly visibly sky. I then tried it on some other photos until I found this which resonated both with my stylistic goals and the feeling of the content.

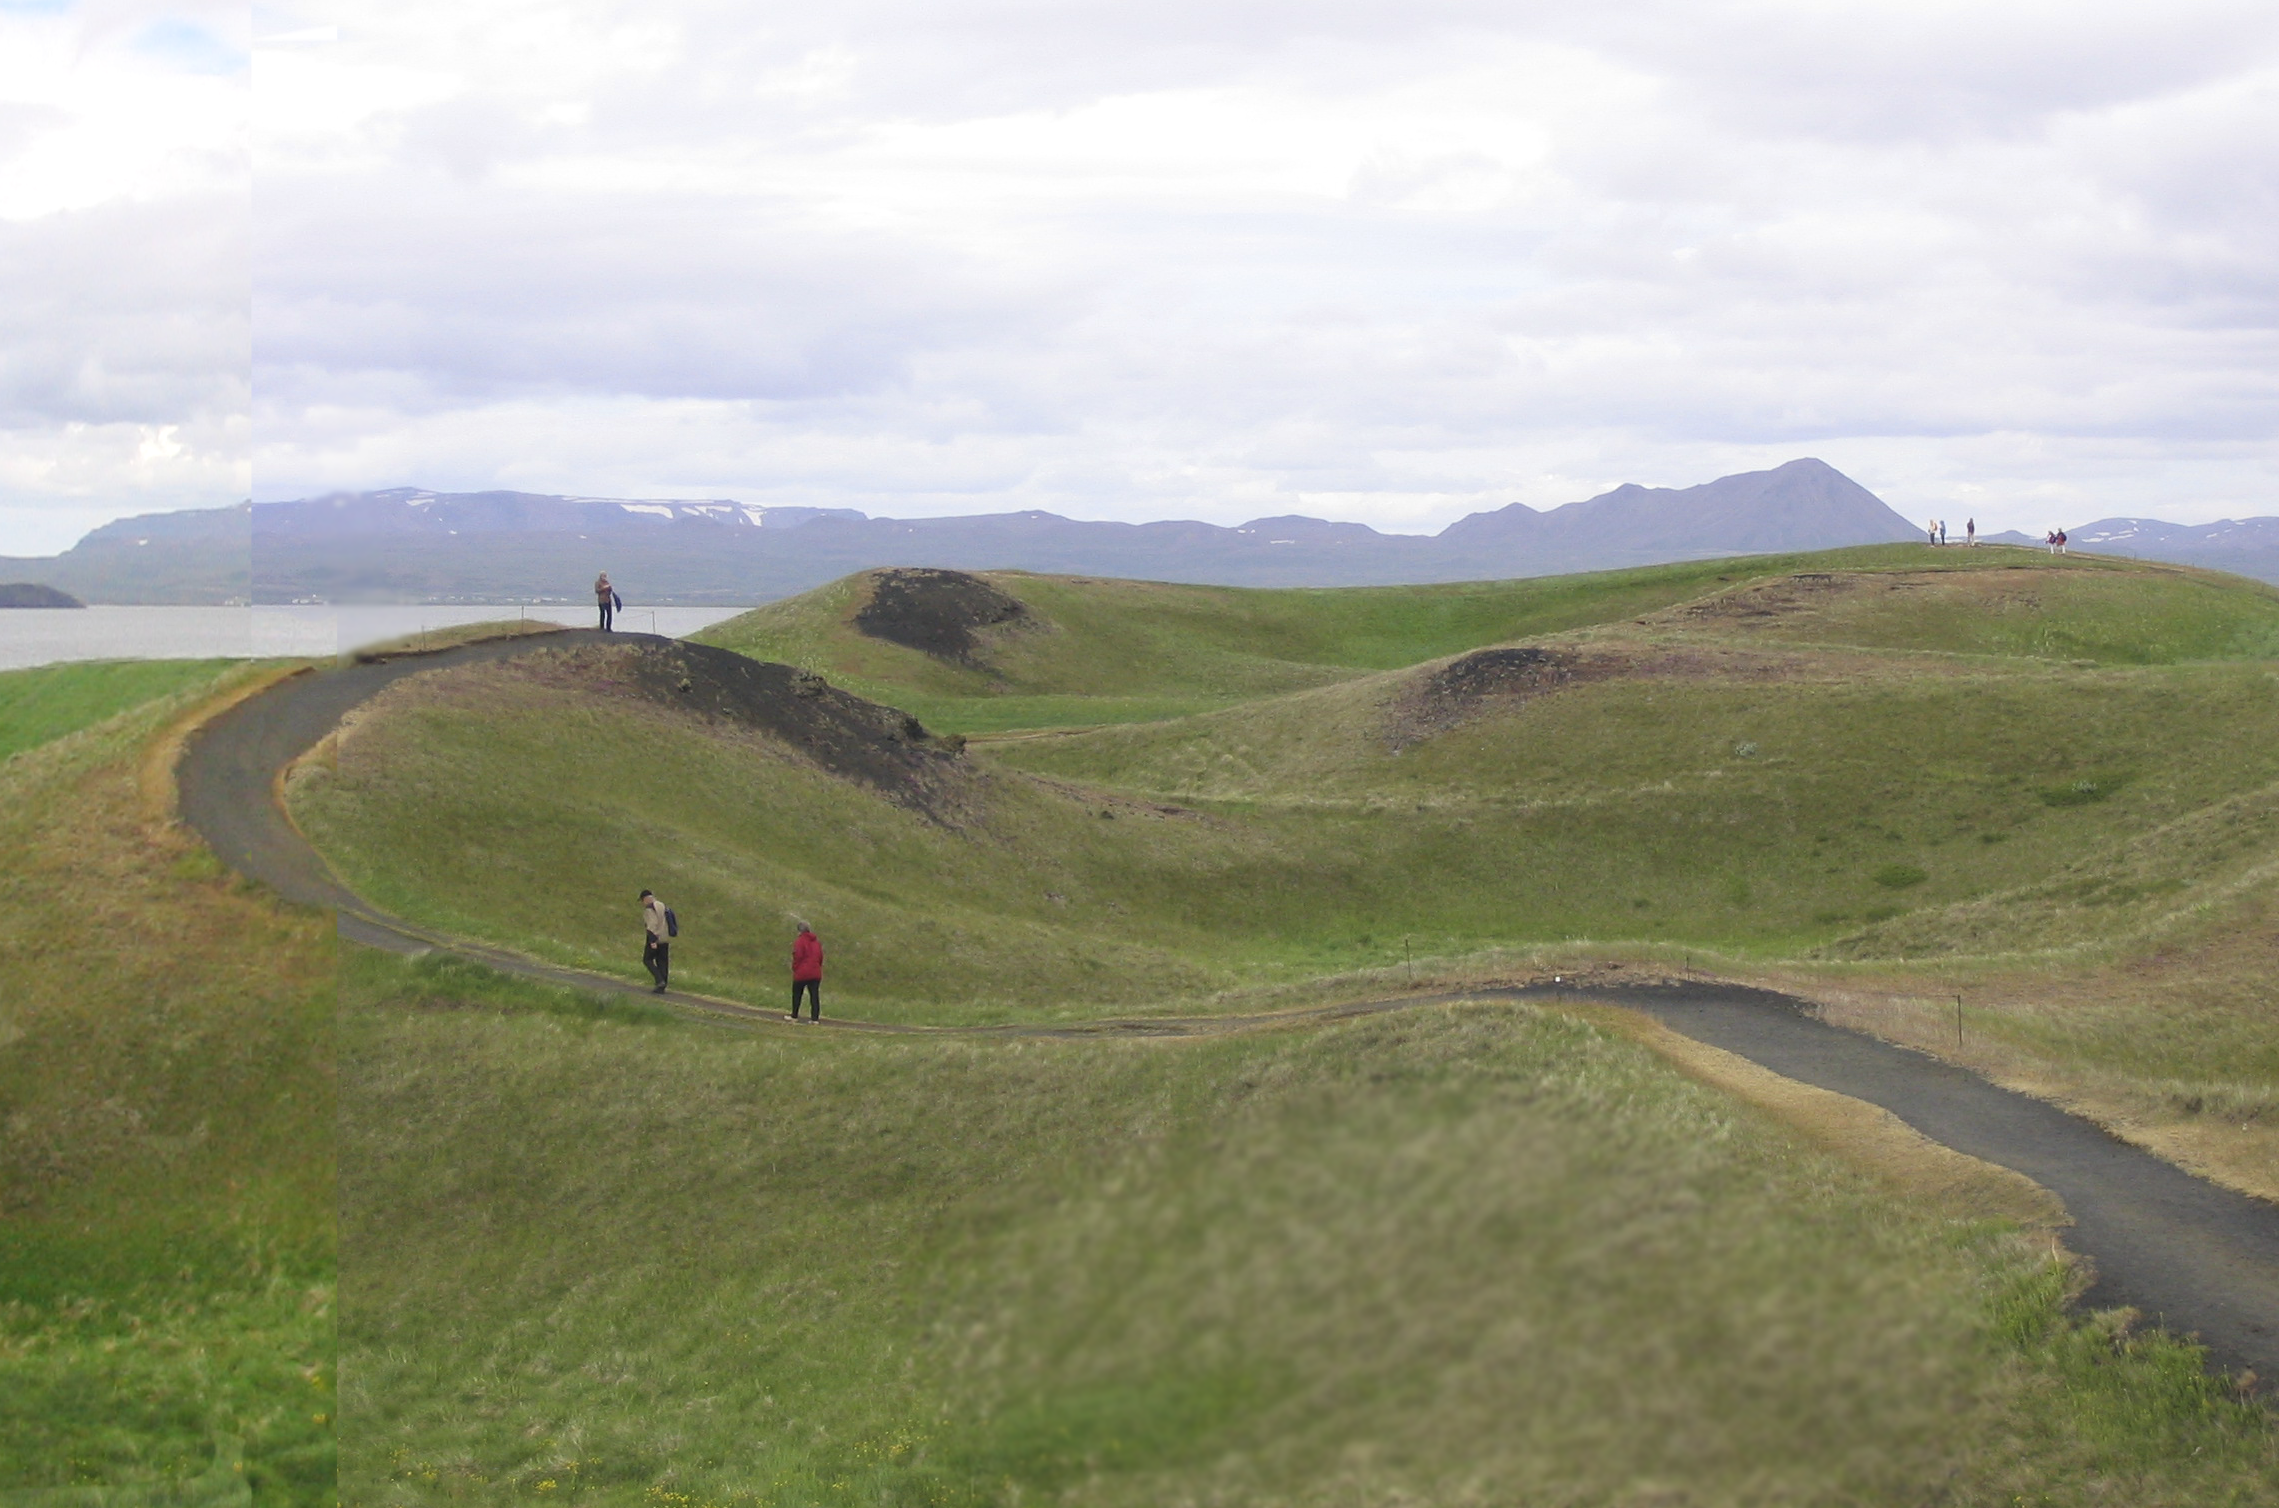
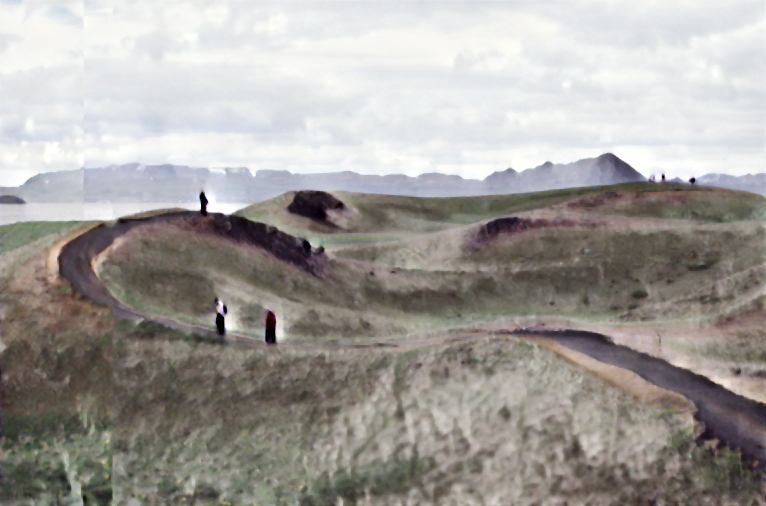
However, it was annoying that path goes out of the picture on the left. Now I had to go back to my photos and create a composite image where the picture was framed better.
The seams are visible in some areas, but because the image will now be fed through the neural model, we can hope that the seams will not stand out in the final result. As I had trained several models with slight differences, I now made these three drafts, all slightly different. The seams have not completely disappeared, but anyway they are not where the viewer will most focus on.
In this example I have described a typical basic workflow using one content image and one style. In most cases, though, I would assemble a picture from several photos, each processed through a neural-model if needed, and possibly adding a handpainted figure or object. In this way it is possible to process the background in a different way than what is in the foreground. I am aware that some neural network researchers already think of making a network do all this automatically: to segment the image into parts and apply different filters on these segments. I can understand the drive for such research, but as an artist I prefer to do this part myself 🙂
The bag of tricks does not end here. What about running an image sequentially through several neural filters. Maybe so that the effects of each filter are more subtle but add up when the image is going through several filter. Or one could use a Processing script followed by a neural filter. There sure are enough paths to explore and be creative.